Facebook
 Google
 GitHub
 Linkedin
Creating and Using a Virtual Environment in Python
An overview of the theory, implementation, and reason to utilize a virtual environment in your Python scripting journey.
A Python virtual environment is a compartmentalized Python environment that relies on a folder structure to deliver an isolated Python environment to develop. This is likely a similar definition you will find from many other sources on the internet. A use case really shows the benefits of this best practice when you are developing a scripting project.
Why are Virtual Environments Used?
The recent end-to-end custom HMI development series on Control.com is a perfect example of the benefits of using a virtual environment. We required a FastAPI application, and let’s assume we used a Flask application instead of traditional HTML, CSS, and Javascript for the front-end application. Both of these Python libraries are third-party libraries, meaning that they are not installed with the base installation of Python. We would need to use the pip command line tool to install FastAPI and Flask from the Python package repository PyPi. These modules would then live in the Python/Python311/Lib/site-packages directory where you installed the root or default python binary executable python.exe on your system.
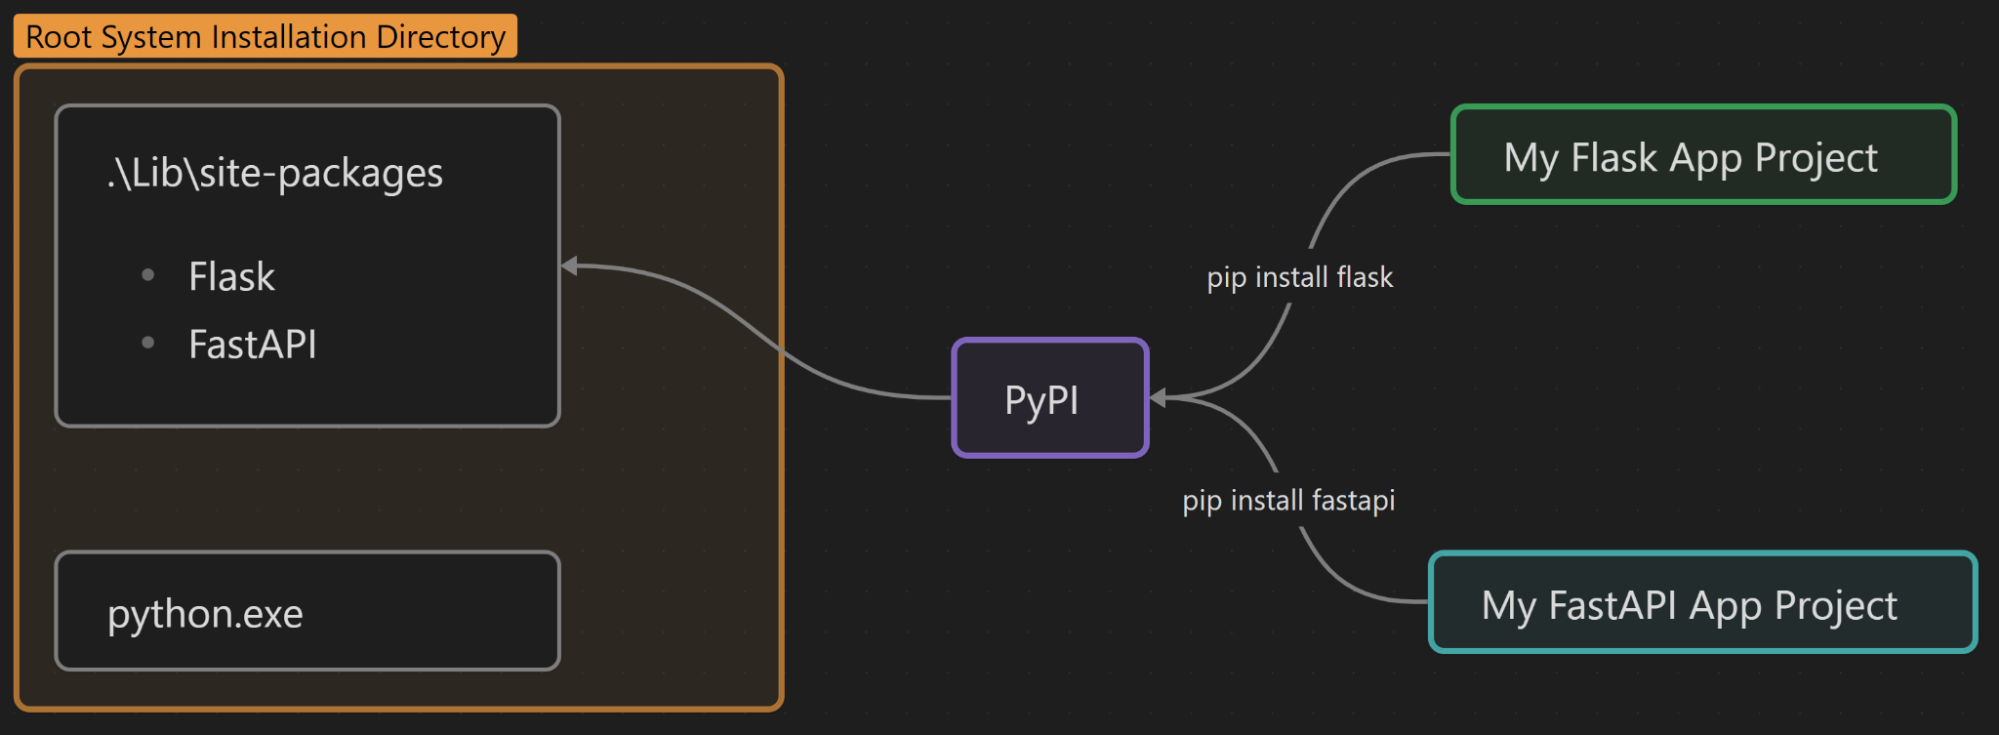
Figure 1. Installation of third-party modules without a virtual environment. Image provided by the author
Using the root Python environment in this manner is not wrong, and you will still be able to learn and progress in the language. However, it starts to fall apart when you attempt to use version control systems or simply communicate the dependencies (third-party modules) that you used in your project.
Developers will normally write dependencies to a requirements.txt file that is uploaded to a version control system like GitHub. Without using a virtual environment, how could another team member distinguish which third-party module would be required to recreate or update the Flask application when they see something like this in the requirements.txt file?
click==8.0.1
Flask==2.1.1
itsdangerous==2.1.0
Jinja2==3.0.1
MarkupSafe==2.0.1
pydantic==1.10.2
typing-extensions==3.10.0.2
uvicorn==0.15.0
watchgod==0.7
The dependencies are followed by the version numbers used at the time of software development. Notice how the requirements are not what you would expect. FastAPI is not a single dependency, but rather a collection of dependencies merged together. Furthermore, there is a “Flask” dependency, but Flask has some overlap with FastAPI dependencies such as Jinja2. The team member attempting to help fix a bug or recreate the sole FastAPI project would have a hard time discerning which dependencies are truly required.
This is the problem the virtual environment solves. It isolates project dependencies required for a specific project.
How do Virtual Environments Solve This Problem?
Virtual environments isolate project dependencies through a single folder structure named venv within the project directory on your system.
For example, I might create my Flask project at:
PS C:\Users\myUser\Projects\Flask>
When you create a virtual environment, it drops a venv directory within the project directory like this:
PS C:\Users\myUser\Projects\Flask\venv>
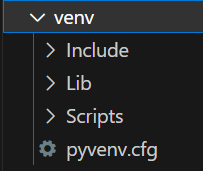
Figure 2. Venv directory contents. Image provided by the author
There are a ton of files nested within the Lib and Scripts directories, so we will only focus on the essential files as this is an overview article:
- Include\ = This directory is used to include C header files for any Python packages that depend on C extensions. It’s empty unless you explicitly install a Python package with a C extension
- Lib\ = This directory houses the site-packages\ directory. Within this folder is where all third-party modules will be installed to. This is the whole point of a virtual environment; it houses third-party modules in a compartmentalized location separate from the root Python installation site-packages\ directory in your system directory. They instead live in your project directory in this venv\Lib\site-packages directory.
- Scripts\ = This directory contains 3 very important files.
- The Python binary executable that the virtual environment uses as an interpreter python.exe.
- The pip executable used to install third-party libraries to the virtual environment pip.exe
- Lastly, the activation scripts used to activate the environment. Either activate.bat or Activate.ps1
- pyvenv.cfg = This file can be considered a supervisor or navigator for your underlying system. It directs your system to use the python.exe interpreter from the virtual environment and to use third-party modules from the venv\Lib\site-packages folder. There’s a lot more complexity to this piece which we will omit from the scope of this introduction article.
A visual representation to summarize the above points:
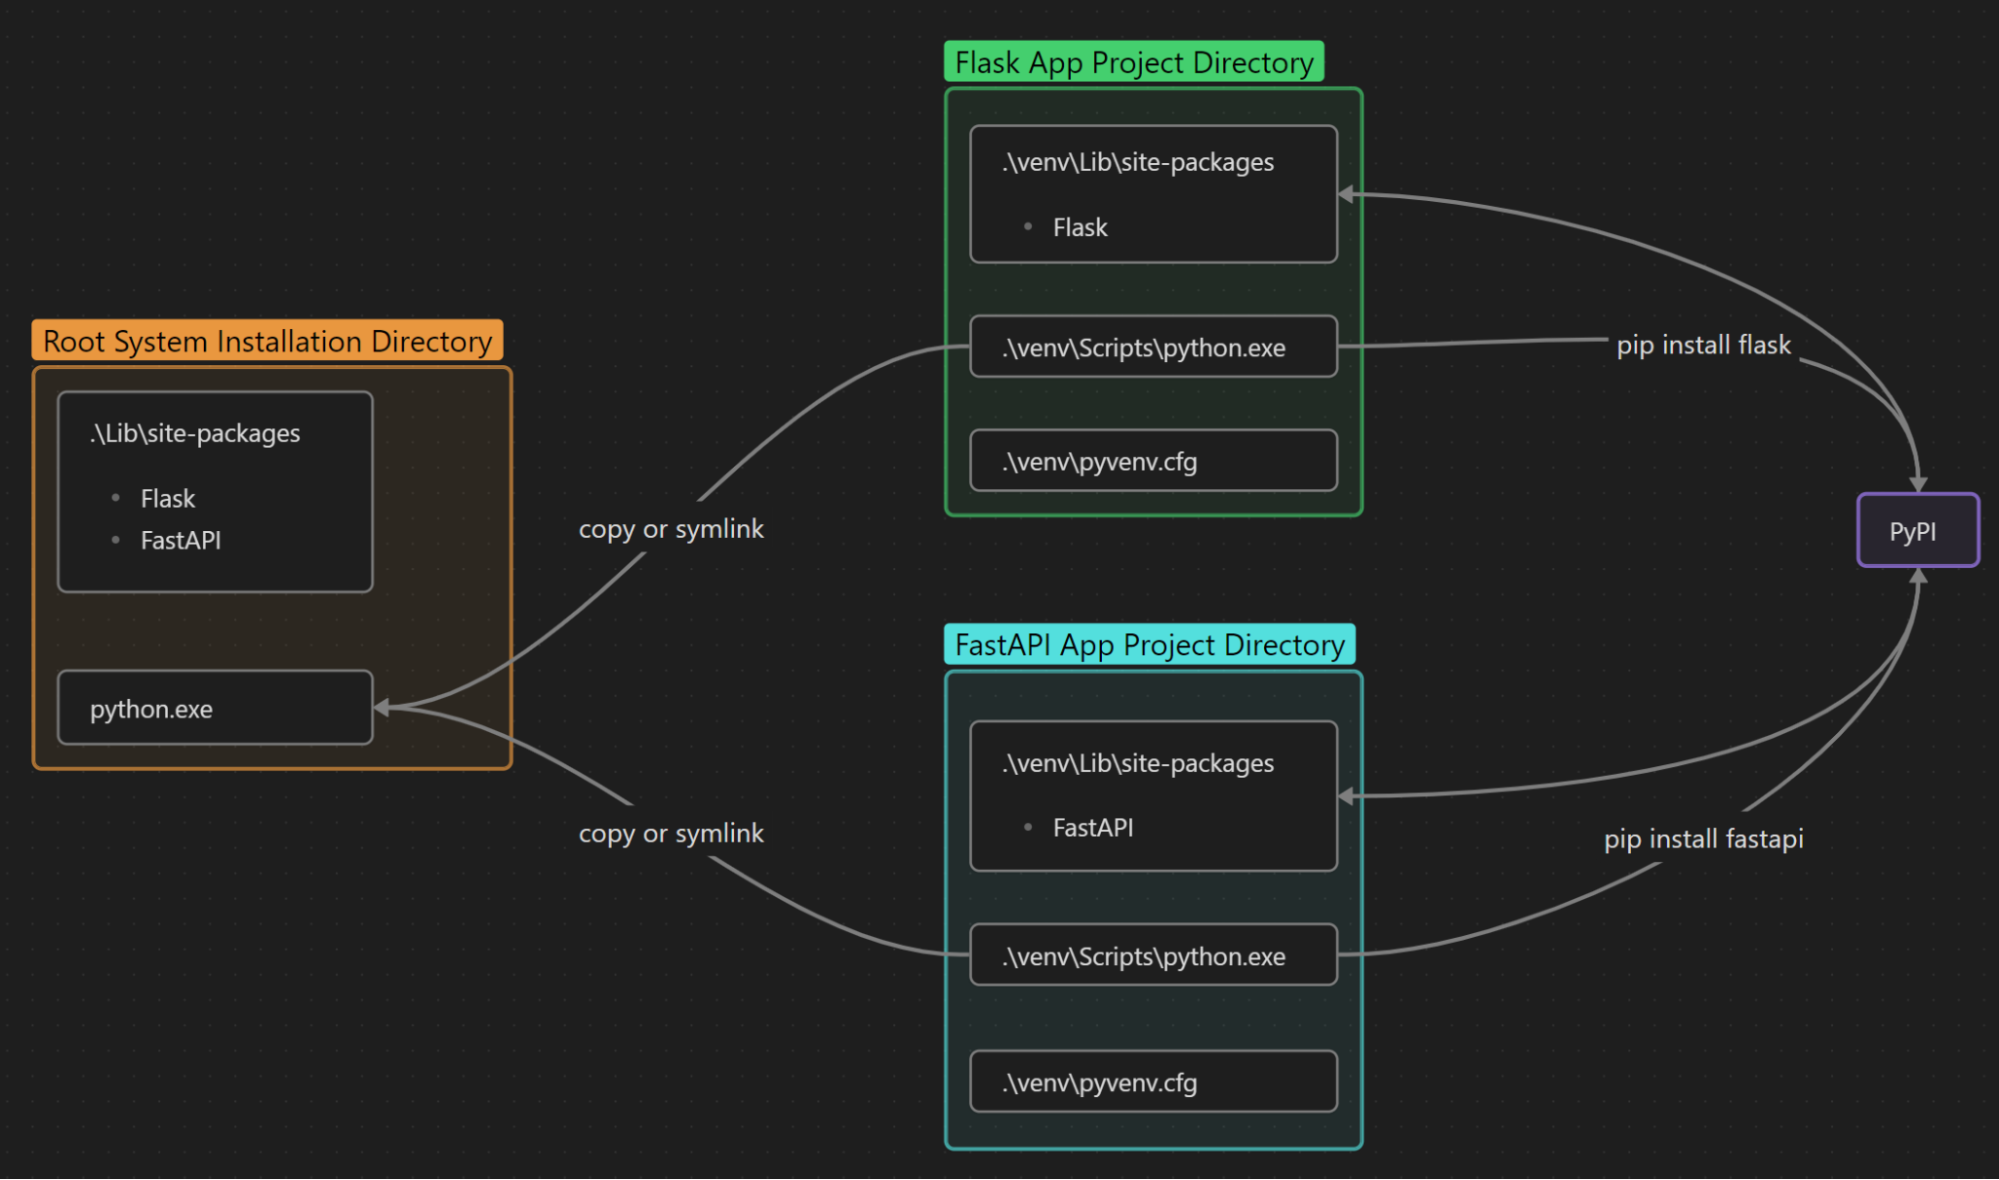
Figure 3. Simplified virtual environment architecture diagram. Image provided by the author
Creating a Virtual Environment
Best practice when creating a virtual environment is to name it venv. This can be accomplished with the below command line expression executed in the project directory:
python -m venv venv
Activate a Virtual Environment
To activate the newly created virtual environment in your project directory execute one of the activation scripts from the venv folder structure that just popped into the project directory:
venv\Scripts\Activate.ps1
or
venv\Scripts\activate.bat
Upon startup on a Windows OS, a venv\ prefix should be present in the directory in the terminal:

Figure 4. A venv prefix. Image provided by the author
Deactivate a Virtual Environment
In order to exit from the virtual environment, simply type the command in the project directory:
deactivate
The venv prefix should now disappear from the terminal.
Virtual Environments in Python
Virtual environments are a useful developer and hobbyist tool that can help keep project dependencies organized. Hopefully, this intro can aid you in using them in your next project.