 Facebook
 Google
 GitHub
 Linkedin
Raspberry Pi Sense HAT Joystick Controls and Event-Based Programming
The Raspberry Pi 4 Sense HAT add-on can be used to control output events based on feedback from sensors, and the built-in joystick can be used to trigger those events.
If you’ve started to learn programming in any common language these days, that’s great! You’ve likely written scripts that execute sequentially one line at a time from top to bottom. This linear execution of code, similar to a series circuit, is called the imperative programming paradigm. This works great for many applications in the real world. However, what about programs that require a trigger to execute a desired outcome?
What is Event-Based Programming?
Consider human-machine interfaces (HMIs) in industrial controls. When a technician or operator presses a button on the screen, they expect the machine to respond with a specific output. The program behind the HMI needs to be active and ready, just waiting for the user input. It also needs to handle events no matter the order they are delivered. If there are several buttons on the HMI, the program must be ready to respond to any given button in the order presented.
A pseudocode visual representation of the most rudimentary form of event-based programming is represented with if statements to check conditions.
while True: # Infinite loop
    if button1 == clickedOn:
        doSomething
    if button2 == clickedOn:
        doSomethingElse
    if button3 == clickedOn:
        doSomethingDifferent
The concepts of event-driven programming become are much more detailed than the brief description provided. Luckily for us, most modern languages and modules used for event-driven programs do a good job of abstracting away some of the deeper complexities. This allows us to focus on the industrial system, which is the case for the Sense HAT.
Sense HAT Joystick
This tiny board keeps impressing me! How many different features have been crammed onto this device? The Sense HAT comes equipped with a small joystick that can be moved up, down, left, and right. It can also be pressed down for a clicking effect.

Figure 1. The Sense HAT joystick. Image used courtesy of ElectroMaker
To use the joystick with the Sense HAT emulator, you must select the model in the right-hand window and then use the arrow keys and the enter/return key to simulate action. Let’s make a simple script to test in the emulator. There are two main methods that we can use to capture events from the sense_hat module.
Basic Script
The first method we will employ is the wait_for_event() method. This method blocks or pauses the execution of the script on the line in which it is called. This creates a waiting behavior, where the program is standing by for user input to the joystick before executing and code below the blocking method.
from sense_hat import SenseHat

sense = SenseHat()

event = sense.stick.wait_for_event() # Blocking
print("{}; joystick was {} {}".format(event.timestamp, event.action, event.direction))
Pushing an arrow key in the emulator or pushing the joystick briefly in any direction should provide us with a text description of the event, as we can see in the following emulator example.
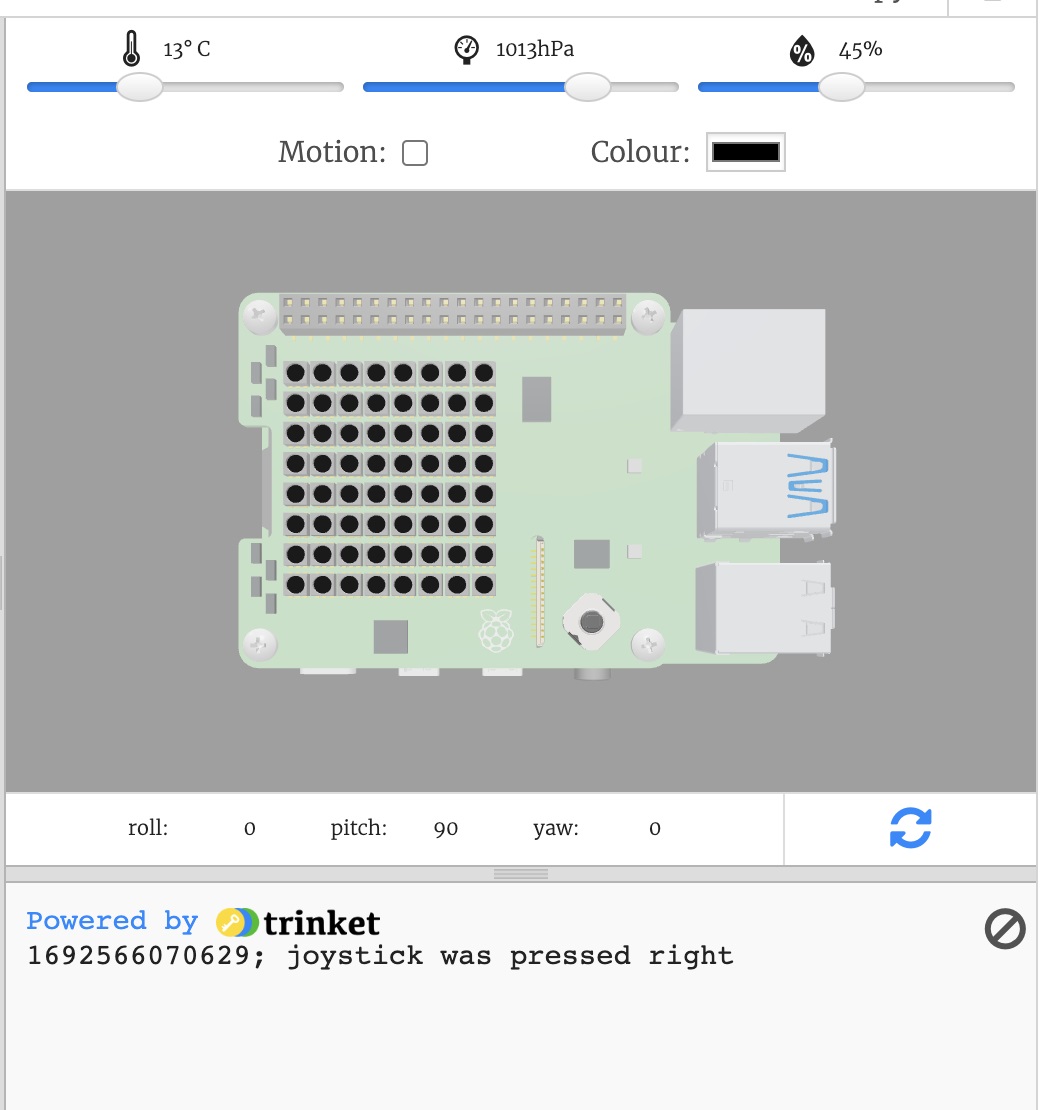
Figure 2. Example output from the wait_for_event() method. Image used courtesy of trinket.io
You’ll notice that after the event has been triggered, the rest of the script executes and, since there is no loop provided, it terminates. This is undesired since the device will be unresponsive to any future events. To solve this, we will add an infinite while loop to revert back to the top of the script. This will re-execute the blocking wait_for_event() method over and over again.
from sense_hat import SenseHat

sense = SenseHat()

while True:
  event = sense.stick.wait_for_event() # Blocking
  print("{}; joystick was {} {}".format(event.timestamp, event.action, event.direction))
If we press the joystick briefly in one direction and let it return to the central home resting place, we’ll notice that two events now appear.
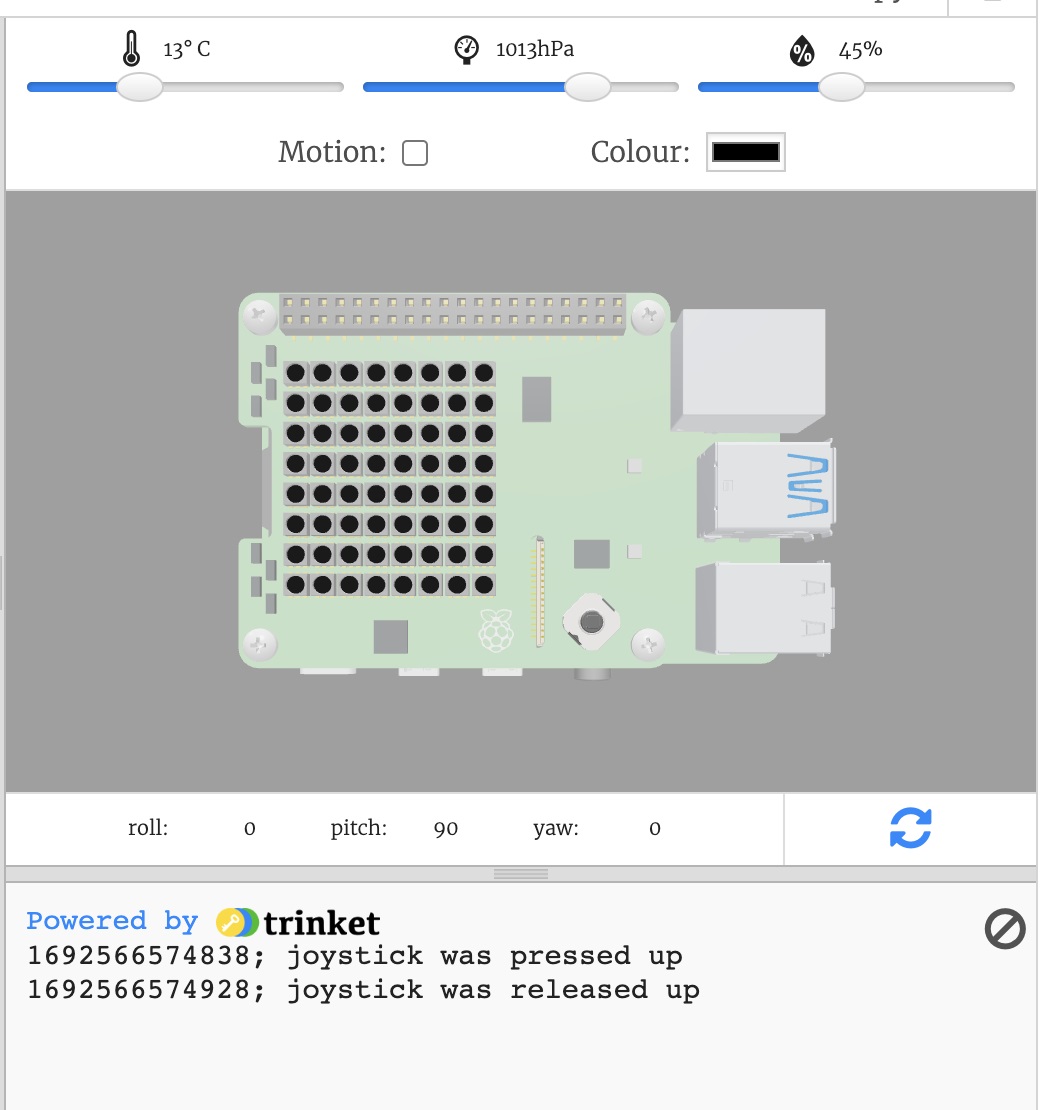
Figure 3. The result of adding an event loop to the script. Image used courtesy of trinket.io
The action of pressing the joystick up and then releasing are unique events. Similarly, if we push the joystick up again and hold it in place, the while loop will very rapidly register the holding action as a series of events. Once agan, releasing the joystick will yield another new single event.
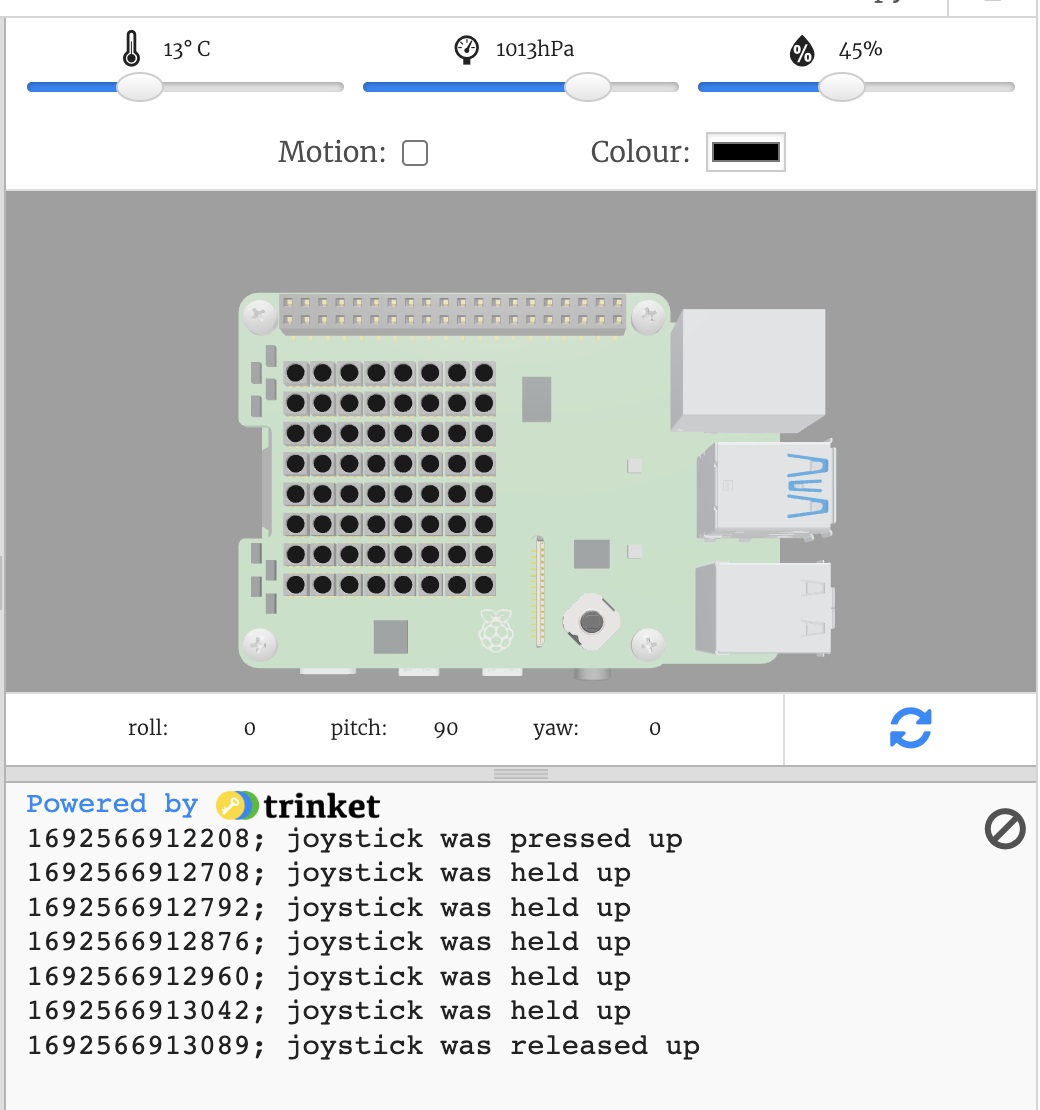
Figure 4. Example output from holding down the joystick. Image used courtesy of trinket.io
Callback Functions
Another, more sophisticated solution, to event-driven programming is callback functions. A callback function is a function that is created to be called later in the program, such as when an event occurs.
The callback function is often supplied as an argument to another function. In simple terms, it is a function that is called by another function when an event occurs. In the case of the sense_hat module, this complex topic is made more user-friendly.
As an example, perhaps we want an action to run on the sense HAT when the up arrow is pressed. To do this, we will define a callback function called pushed_up(). We will then pass this function as an argument to the native stick.direction_up class method (function linked to a class). We will also create the event loop with an infinite while loop. This is easier explained in an example use case.
from sense_hat import SenseHat, ACTION_PRESSED

sense = SenseHat()

def pushed_up(event):
  if event.action == ACTION_PRESSED:
    print("Joystick pressed up")

sense.stick.direction_up = pushed_up

while True:
  pass
When the joystick is pressed up, the direction_up method will call the pushed_up callback functions that simply print the event. The output appears as follows:
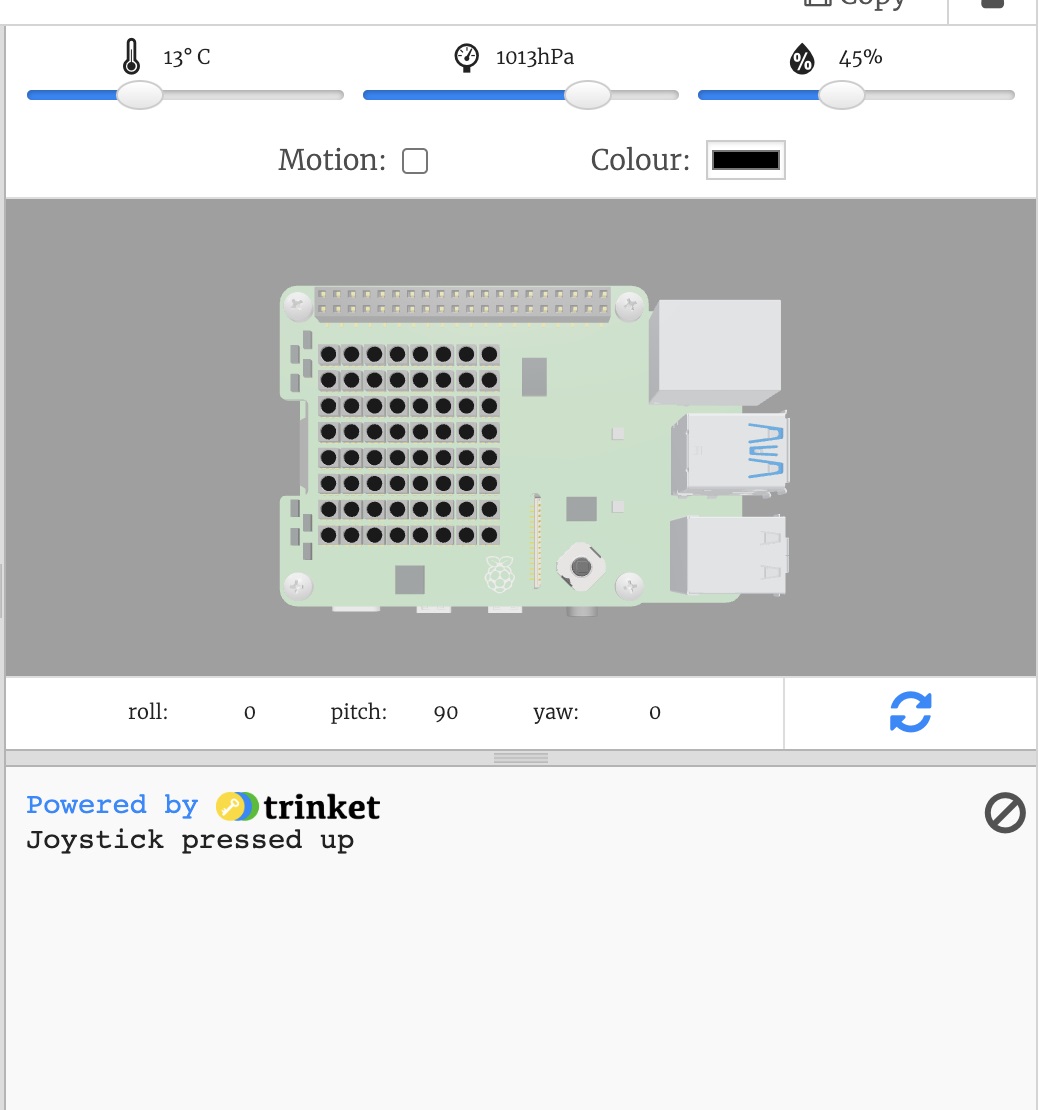
Figure 5. Example output from utilizing a callback function with stick.direction_up. Image used courtesy of trinket.io
Further Sense HAT Applications
The extensibility of the Sense HAT has a wide range of options with the joystick and sense_hat python module. The use cases shown here are very basic and can be modified to form more useful tasks applicable to a wide variety of applications.


Event-based programming is probably a new term for Programming by Using Interrupts!