Facebook
 Google
 GitHub
 Linkedin
Setting IP Address and Networking Parameters on a PowerFlex VFD
Parameters control the operation and command sources for VFDs. The PowerFlex series from Rockwell Automation is no exception. Learn how to adjust the parameters for networking and IP configuration.
When you want to control the speed of a 3-phase AC motor, one of the most popular methods is to use a variable frequency drive, or VFD. Allen-Bradley by Rockwell offers a line of VFDs that work with most AC and even DC motors.
The PowerFlex line is capable of powering fractional HP motors up to 6000 HP. These drives are capable of ramping and maintaining programmed frequencies, but they have many initial parameters that need to be set for PLC connection.

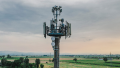
Figure 1. Adjusting a VFD. Image courtesy of Rockwell Automation
What Is An IP Address?
Every device on an Ethernet-compatible network has an IP address, and these can be fixed manually (static) or issued by a router or software on a server (dynamic).
The IP address is a unique identifier for each networked device, containing four bytes separated by a “.” Each byte contains a value from 0 to 254. A common IP address is 192.168.0.1 and is often used by many commercial Ethernet routers. A master device will use the IP address to send and receive messages from other devices on the network. Every device on the network will need an IP address set and there are a few ways of doing that.
The following list outlines several methods of adjusting those parameters: through the onboard keypad, in the project itself, or using the USB utility software.
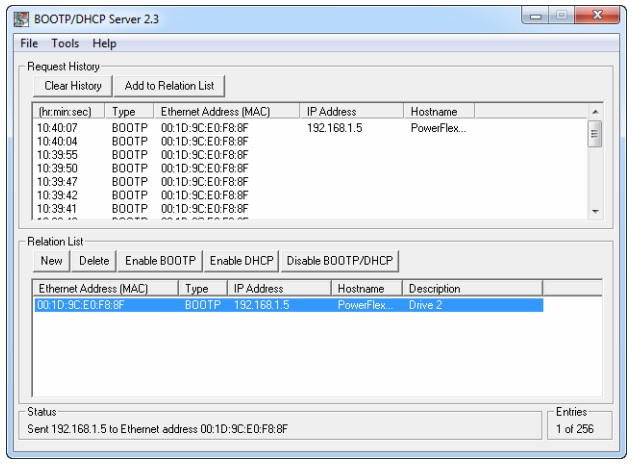
Figure 2. Example of a BootP address list. Image used courtesy of Rockwell Automation (page 28)
First, we need to have a short discussion about the conditions that would require setting the IP address manually versus set by a server.
Parameters vs. BOOTP
When you install any Rockwell Automation software, this program called a ‘BootP-DHCP tool’ is installed as well. This is a small utility used to set the IP address remotely of most Allen-Bradley networkable components. Upon opening the software, the connected network will be scanned for devices. DHCP devices broadcast a special message, and the BootP software will capture those MAC addresses and display their status.
To help find the device you want to set, look on the device for the MAC address, a long string of hexadecimal numbers separated by “:”. Just like the IP address, the MAC address is an identifying feature, but it cannot be changed. BootP will display the MAC address of devices that are in DHCP mode. Once you identify the PowerFlex drive you want to set simply create a new relationship. This software will allow you to set the IP address and disable DHCP mode, but no other parameters can be set.
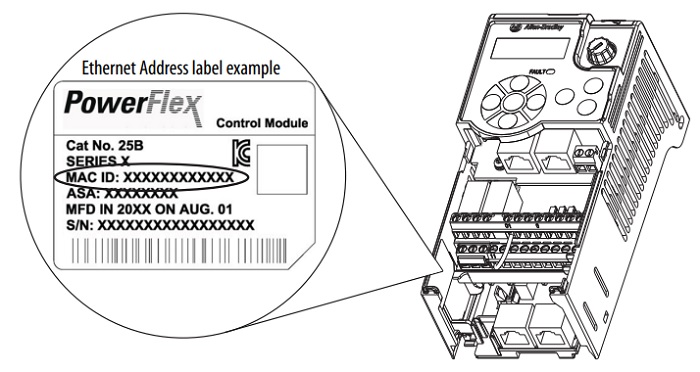
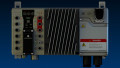
Figure 3. Finding the MAC address on a VFD. Image used courtesy of Rockwell Automation (page 27)
If you need absolute control over the network address of each device, or if there will not be a computer connected that can host the BootP-DHCP tool, you will need to set each IP address manually.
Keypad and HIM Access
The PowerFlex drives typically have an LED display and navigational buttons. These are used to set the IP address and other relevant parameters during commissioning.
Many PowerFlex models may also use an HIM (human interface module) which is a small remote terminal used to interact with the drive (sometimes also called an HMI). This HIM can be used to set the IP address similarly only you don’t need to look up the group list codes in the manual. Each parameter is written out in a readable language. Use the keypad on the HIM to navigate through the menu and set your desired IP address.
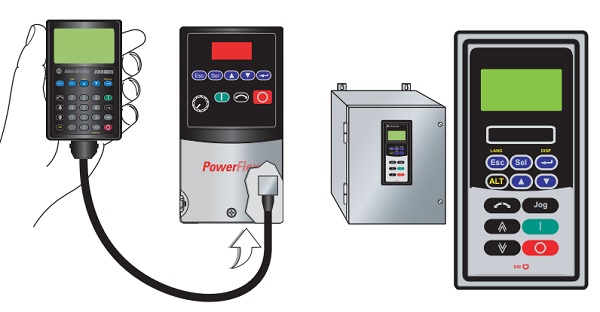
Figure 4. An external HIM can take the place of the on-board keypad to set parameters for some VFDs. Image used courtesy of Rockwell Automation (page 1)
Once any changes are made, be sure to cycle power to the drive.
Important Parameters
When you connect a new device to a network, it usually has the BootP/DHCP enabled by default. If we are using static addressing, this control parameter must be changed.
Once power has been applied to the drive, use the keys to access the Address Select parameter. This must be set to enable the drive to look at parameters for its IP address. The default value looks for a BootP server.
- PowerFlex 525: C128 set to ‘1’
- PowerFlex 527: Settings -> Network Settings -> ‘Static IP’
- PowerFlex using Enet board 20-COMM-E: Access the 20-COMM-E device, Parameter 03 set to ‘0’
The next setting is the IP address itself.
- PowerFlex 525: C129-C132
- PowerFlex 527: Settings -> Network Settings -> IP Address -> octet and value
- PowerFlex w/ 20-COMM-E: Parameter 04 - 07
These are found as a group of 4 parameters, each containing one octet of the IP address. Usually, they ship with a default of 192.168.0.1, or something similar.
After the parameters have been configured, completely cycle power to the drive for the device to initialize the new settings.
Setting Parameters in a Logix Project
Once you have the IP address configured, you can add your PowerFlex drive to your control system. Depending on the PLC you have, you might be using either Connected Component Workbench (CCW) or Logix Designer (Studio) 5000.
Add your PowerFlex model from the add devices list and select your drive rating.
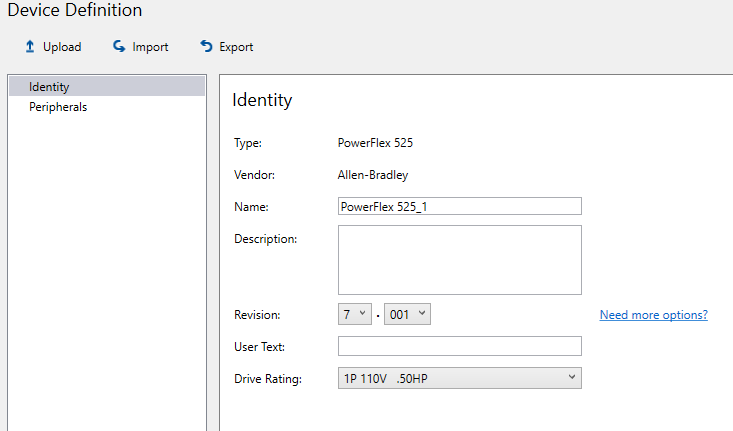
Figure 5. Adding a new PowerFlex to the project. Image used courtesy of the author
Once added, you can click on the ‘parameters’ tab on the left side of the PowerFlex properties window. This opens a list of all the parameters in the drive. If we wanted to change our IP address from CCW we simply scroll down to parameter 129 and we can change any octet or subnet mask we need to.
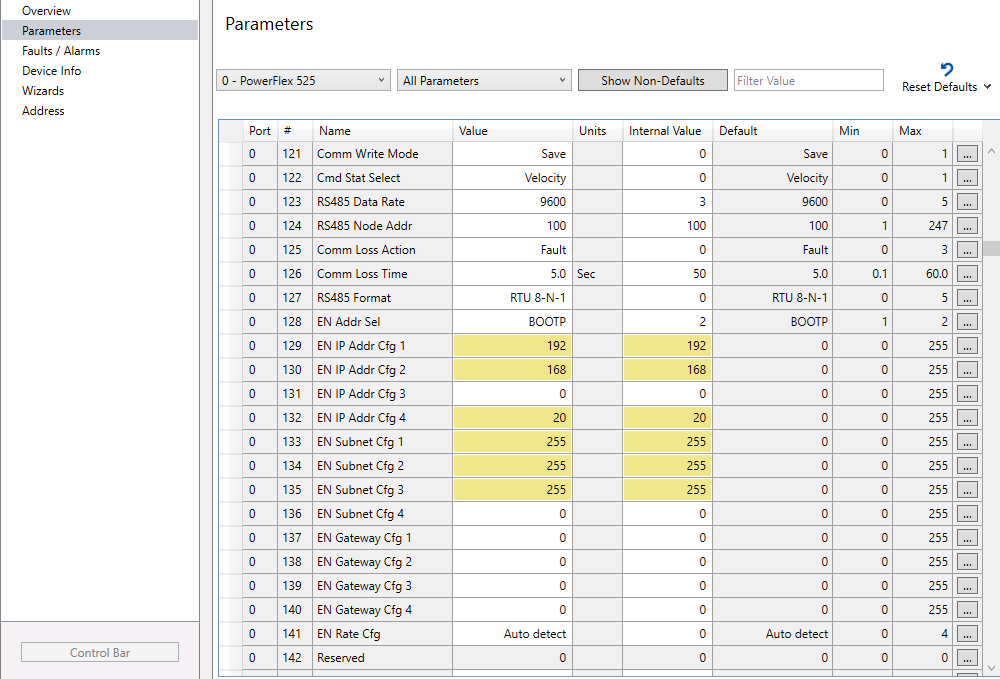
Figure 6. Communication parameter list in Logix Designer 5000 or CCW. Image used courtesy of the author
Changing With Logic
Some applications require changing parameters as conditions within the equipment change. Combining conveyors running at different speeds and using a buffer conveyor would require changing the speed of the motor dynamically. As parts travel onto the buffer conveyor at one speed the conveyor needs to speed up to match the speed of the downstream conveyor.
When you use a PowerFlex drive in a Studio 5000, you have access to parameters within your tag database. These tags can then be set using logic as sensors detect components. Typically, the networking parameters would have no reason to change during program execution.
USB Drive Utility
The PowerFlex 52x series has a removable faceplate and can be connected to a computer with a USB cable. This should be done before powering up the drive with AC voltage.
Plug the USB cable into the drive, and a small application will open, allowing you to upload a drive config file to your computer. Open this file with Notepad (or a text editor), adjust the correct parameters, and then use the included application to re-download the parameter list.
This process is simple, but it can save a lot of time when commissioning many drives all at once.
More Than One Way to Set A Parmeter
As you can see, there are multiple ways to set IP addresses or parameters within a PowerFlex drive. Even other brands of controllers can communicate with Rockwell motor drives, so you might not have access to BootP or Logix tools, but you always have the option of using analog inputs or simply setting your parameters directly on the drive keypad. Either method you choose should give you the desired results.