Instrumentation and Process Control
Reading Analog Scales
-
Question 1
Interpret the pressure measurement displayed by this gauge mechanism, assuming a gauge accuracy of $\pm$ 1
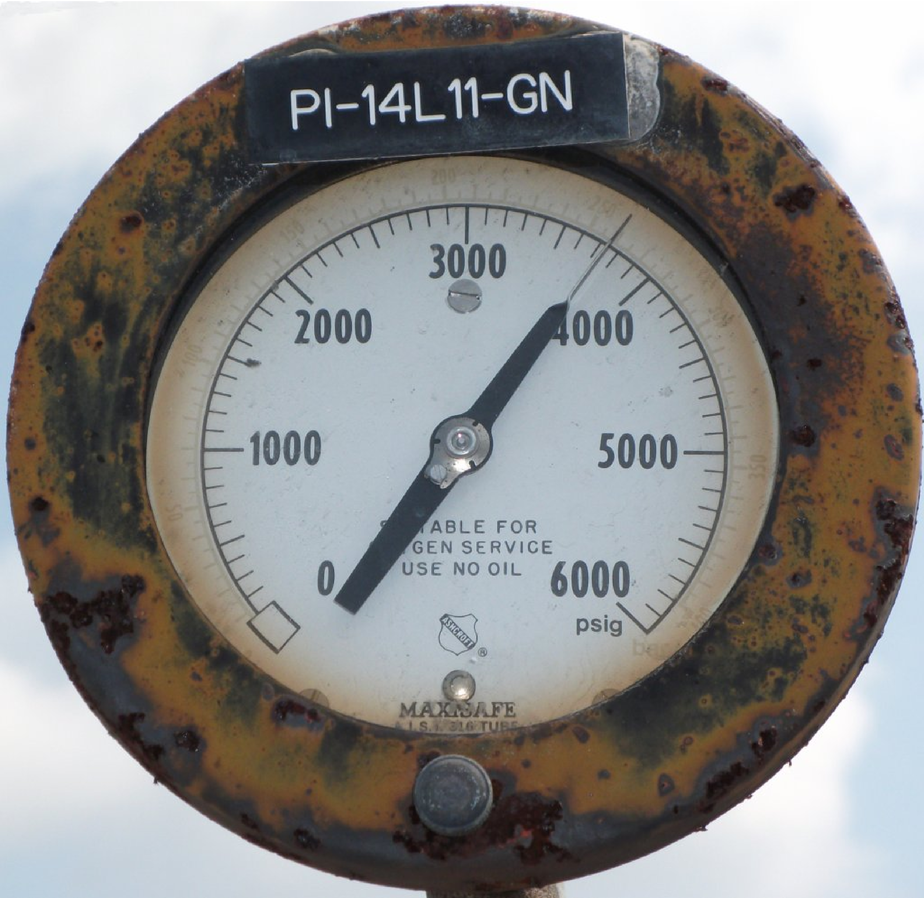
How low and how high could this pressure actually be, given the stated accuracy of this gauge?
Reveal answerPressure = 3750 PSI $\pm$ 60 PSI
This means the actual pressure could be as low as 3690 PSI or as high as 3810 PSI.
-
Question 2
Interpret the pressure measurement displayed by this gauge mechanism, assuming a gauge accuracy of $\pm$ 2
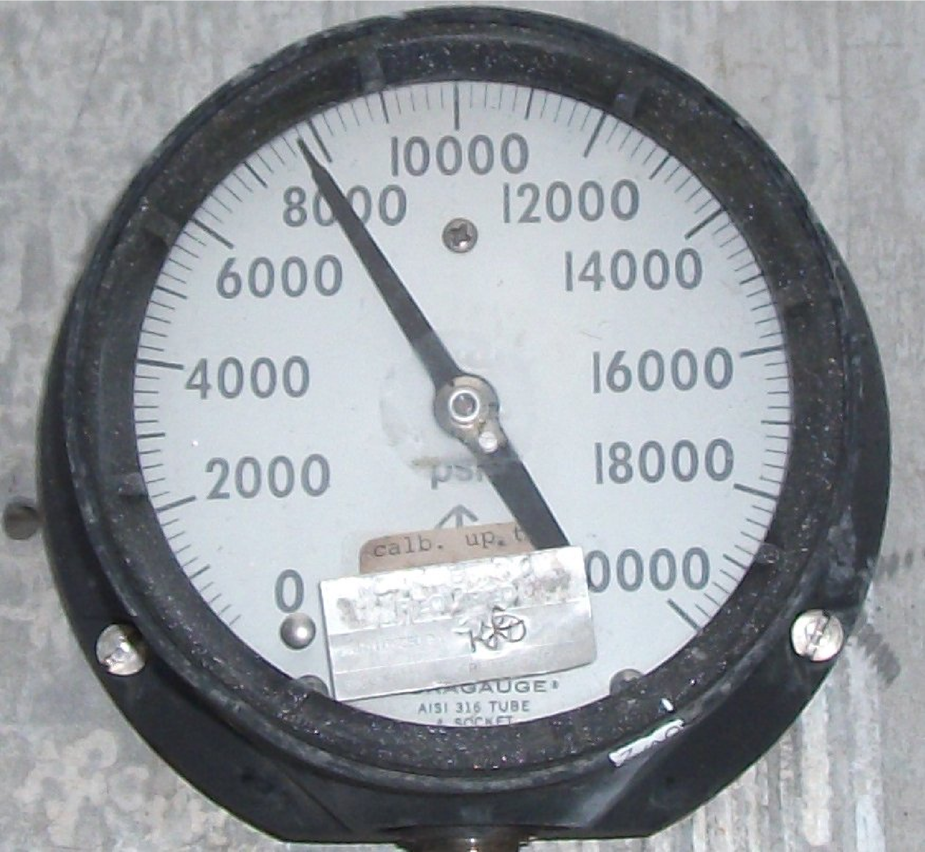
How low and how high could this pressure actually be, given the stated accuracy of this gauge?
Reveal answerPressure = 7800 PSI $\pm$ 400 PSI
This means the actual pressure could be as low as 7400 PSI or as high as 8200 PSI.
-
Question 3
Interpret the pressure measurement displayed by this gauge mechanism, assuming a gauge accuracy of $\pm$ 0.5
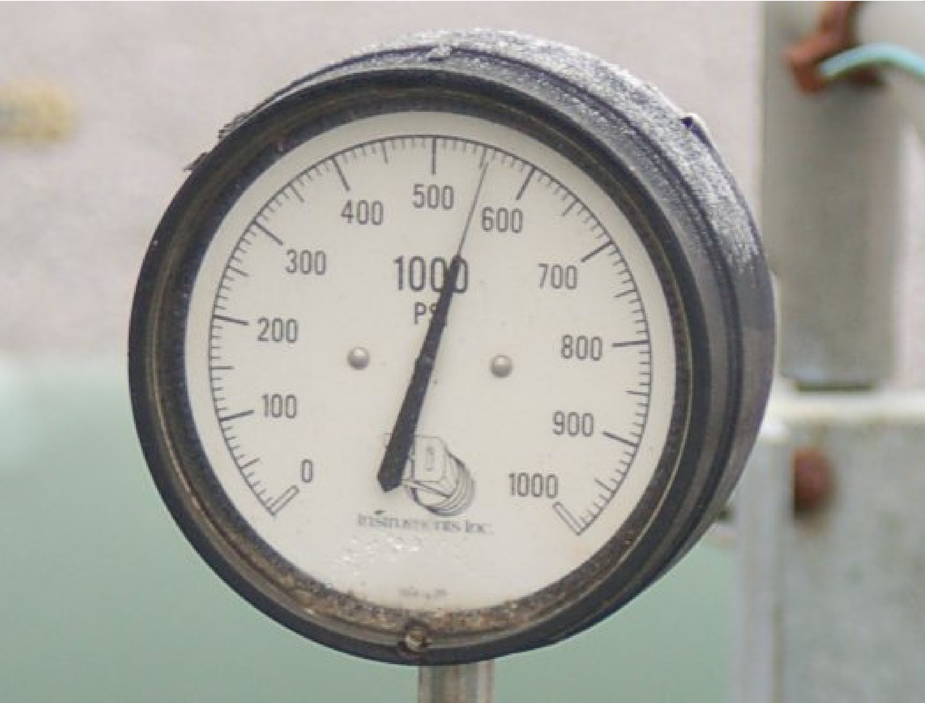
How low and how high could this pressure actually be, given the stated accuracy of this gauge?
Reveal answerPressure = 560 PSI $\pm$ 5 PSI
This means the actual pressure could be as low as 555 PSI or as high as 565 PSI.
-
Question 4
Interpret the pressure measurement displayed by this gauge mechanism, assuming a gauge accuracy of $\pm$ 2
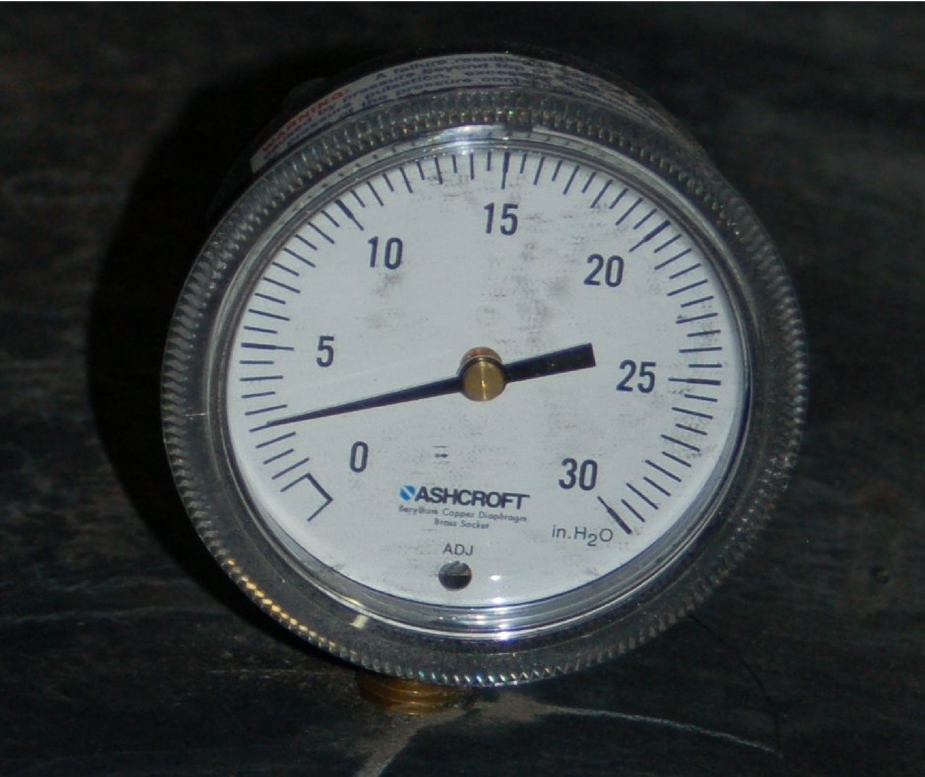
How low and how high could this pressure actually be, given the stated accuracy of this gauge?
Reveal answerPressure = 2.5 “H$_{2}$O $\pm$ 0.6 “H$_{2}$O. This means the actual pressure could be as low as 1.9 “H$_{2}$O or as high as 3.1 “H$_{2}$O.
If you look closely at the photograph, you can see that the camera’s angle to the gauge face is not straight-on, and therefore there will be some parallax error in reading this gauge’s face. If we were to lower the camera’s view to get a more direct look at the gauge, we might see the needle pointing between the 2.5 and 3 divisions, which would mean a pressure of 2.75 “H$_{2}$O $\pm$0.6 “H$_{2}$O.
-
Question 5
Interpret the pressure measurement displayed by this gauge mechanism, assuming a gauge accuracy of $\pm$ 2
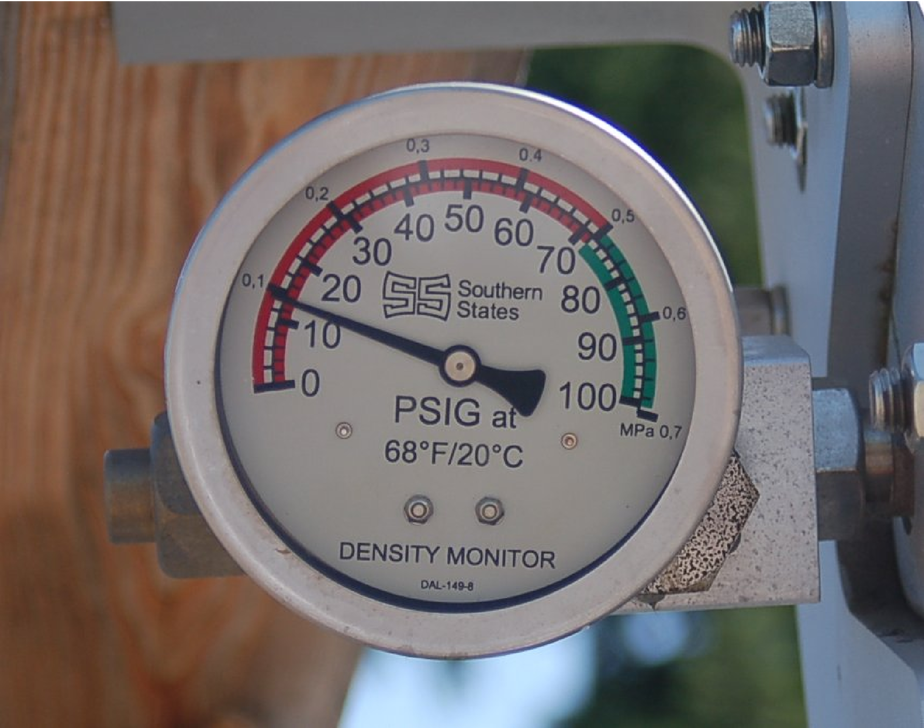
How low and how high could this pressure actually be, given the stated accuracy of this gauge?
Reveal answerPressure = 14 PSI $\pm$ 2 PSI
This means the actual pressure could be as low as 12 PSI or as high as 16 PSI.
-
Question 6
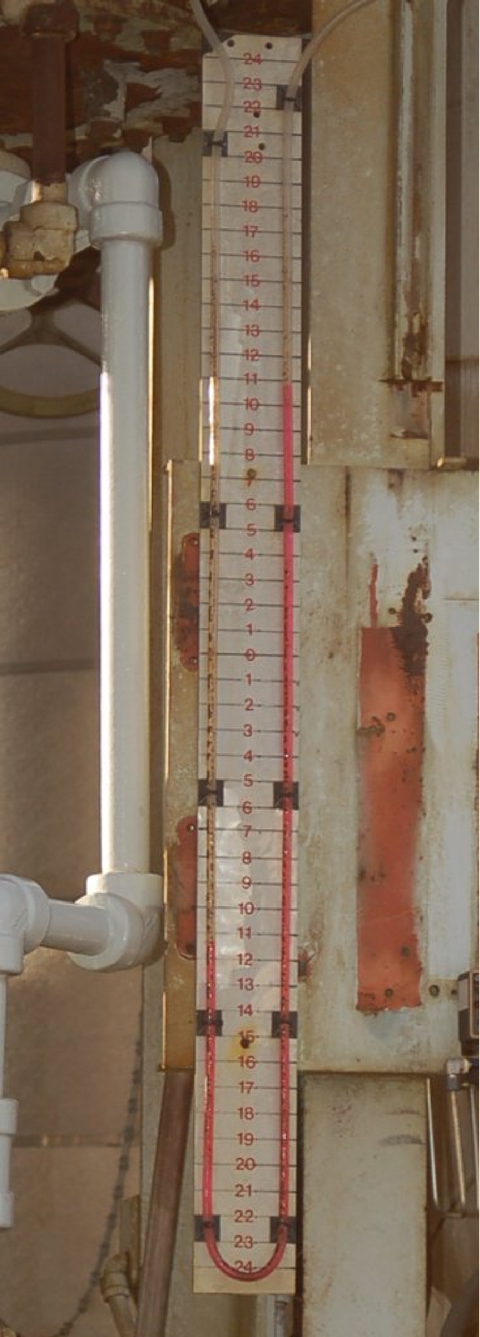
Interpret the pressure measurement displayed by this U-tube manometer, recalling that the pressure will be equal to the difference in heights between the two liquid columns:
 Reveal answer
The pressure difference is approximately 22 inches of liquid column.
-
Question 7
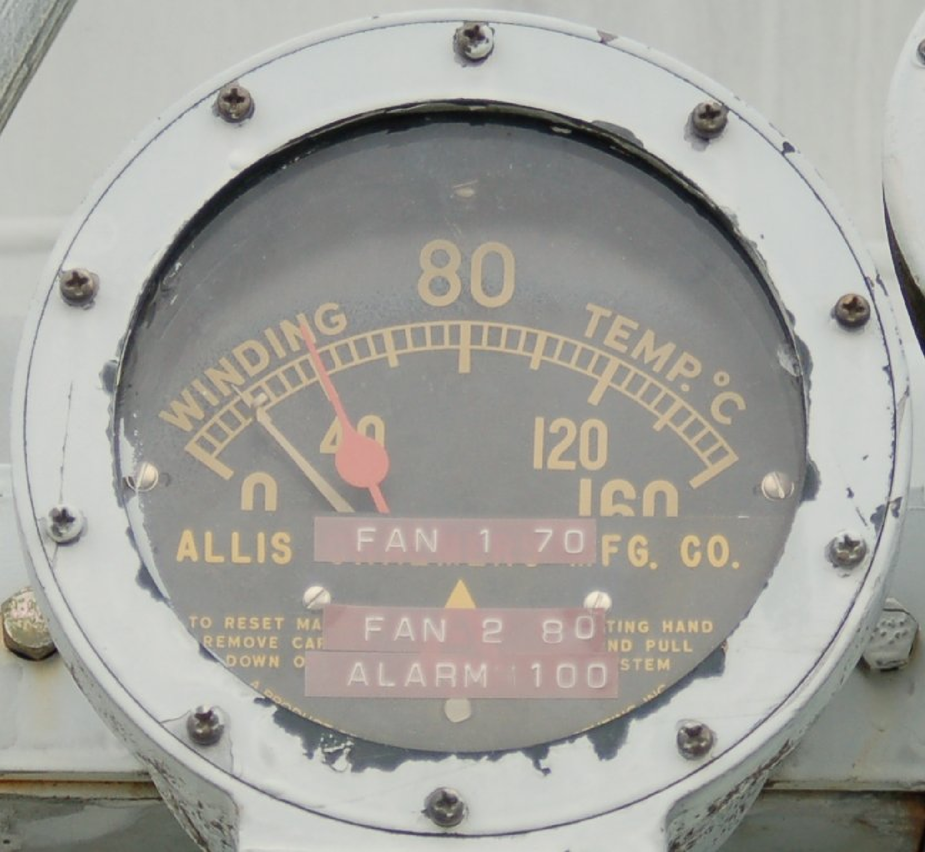
Interpret the temperature measurement displayed by this gauge mechanism, and also identify the meaning of the other pointer:
 Reveal answer
The current temperature is 40 degrees Celsius (red pointer), and the other pointer is a low-temperature capture. In this case, the “capture” pointer shows that the temperature went down as low as 20 degrees Celsius (or perhaps a bit lower, since parallax error is making that pointer appear to read higher than it actually is).
-
Question 8
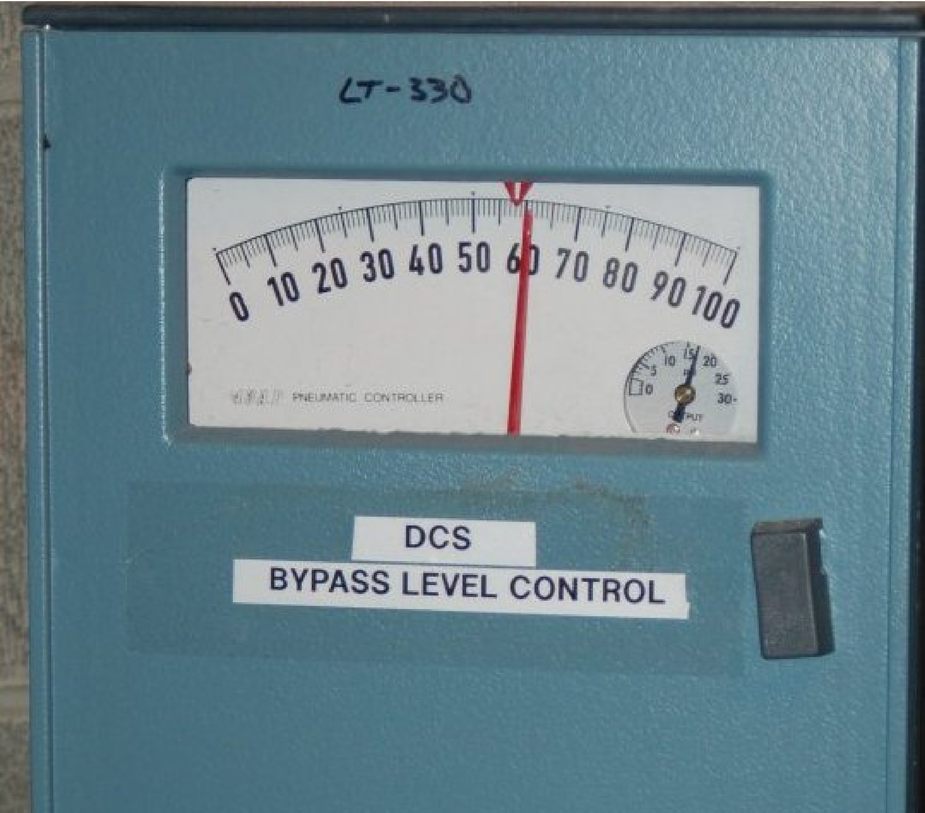
Interpret the measurement displayed by this pneumatic controller:
 Reveal answer
The red pointer shows 61
-
Question 9
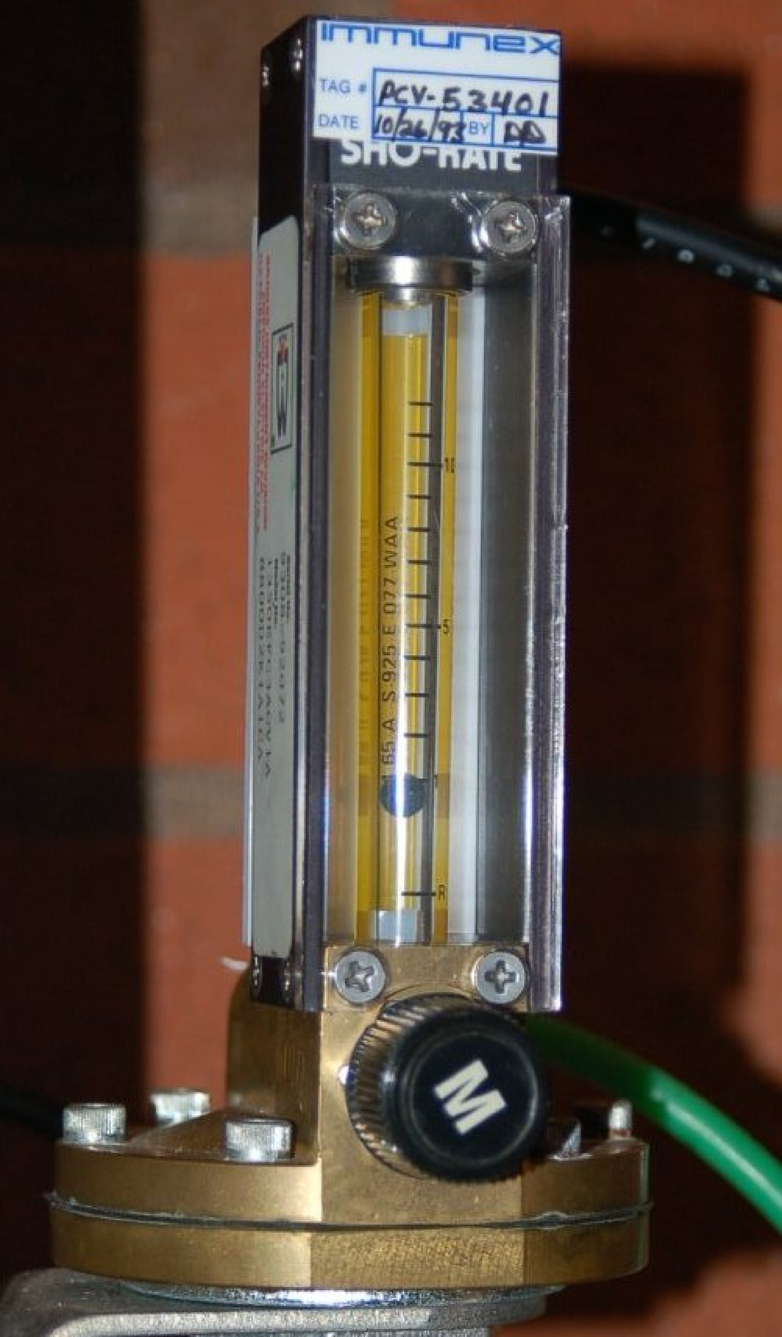
Interpret the air flow measurement displayed by this rotameter:
 Reveal answer
Rounding to the nearest half-division, we see the center of the ball-plummet nearest the “1” mark. No units of measurement are specified on the scale (from this viewing angle, anyway), and so we cannot say if this is 1 SCFH, 1 SCFM, or anything else.
-
Question 10
Machinists use a tool called calipers to measure short distances such as the outside diameter of a shaft. One particular type of caliper has a special scale that slides along with the movable jaw called a vernier scale. The spacing between divisions on the vernier scale is slightly less than the spacing between divisions on the main scale, which means only one division on the vernier scale will ever line up with a division on the main scale at any given time:
In order to obtain a coarse measurement of the caliper’s jow position, read the main scale using the “0” mark on the vernier scale as a pointer:
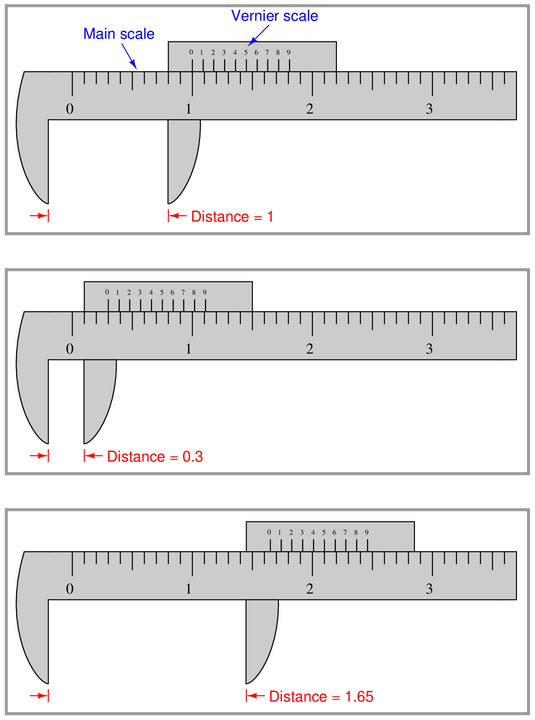
Now, use the vernier scale to read the distance between the caliper’s jaws, when the “0” division on the vernier scale does not line up perfectly with one of the divisions on the main scale:
 Reveal answer
Distance = 0.93
-
Question 11
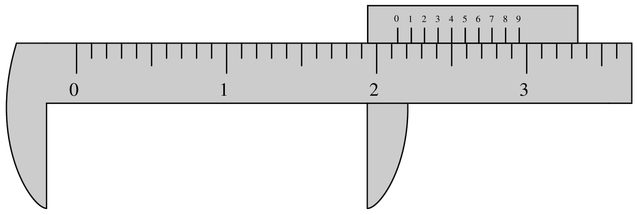
Interpret the distance between the jaws of this vernier caliper:
 Reveal answer
2.14 units
-
Question 12
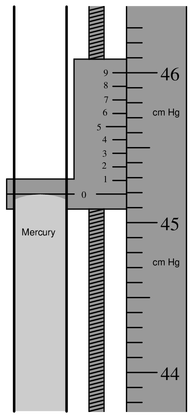
Some precision manometers are equipped with a vernier scale in order to make very precise measurements of liquid column height.
Interpret the reading shown on this mercury manometer. Note: the “hairline” on the moving vernier scale is adjusted to the meniscus height by a screw prior to taking the reading:
 Reveal answer
A pressure of 45.19 cm of mercury is shown on this manometer.

 Facebook
 Google
 GitHub
 Linkedin

very informative
Entertaining and give me new insight, thank you